
Author

What is Macro Technology?
A macro is a section of schematics which you can save for later use. This could even be a whole section of the project. Macros can range in complexity and scope.
Engineers can develop smallest scale macros for individual devices such as:
- Frequency converters
- Programmable Logic Controllers (PLCs)
- Sensors and transducers
More complex macros can encompass functional circuit segments like:
- Motor output circuits
- Measurement and instrumentation loops
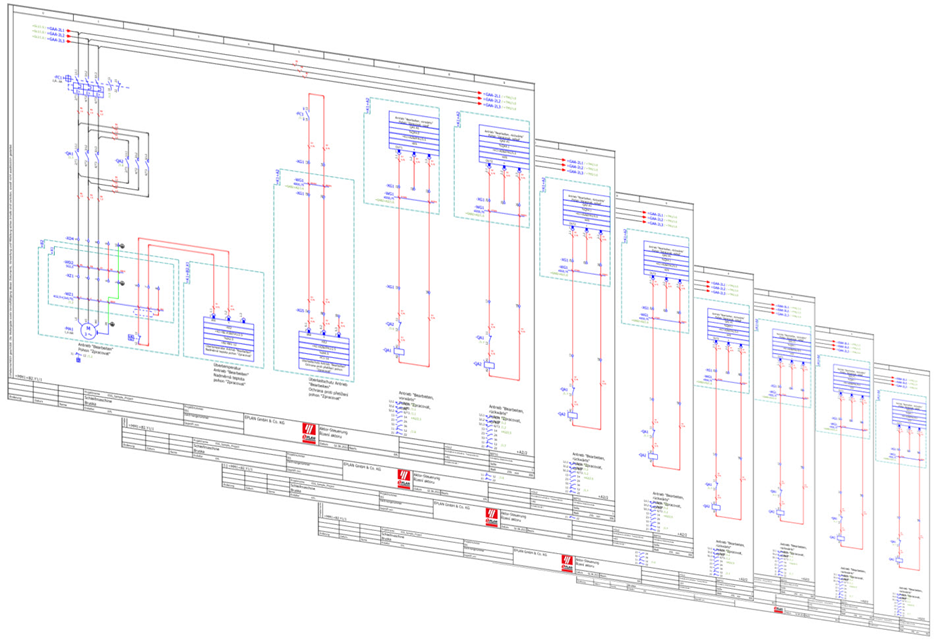
The most comprehensive macros may include multi-page diagrams that implement:
- Main power supply systems
- DC power distribution networks
- Service sockets
- Lighting circuits
- Everything and anything that repeats throughout a project!
Why Should I Use Macros?
Some electrical designers rely on the copy-paste method for these components. However, proceed with caution. The copy-paste method can duplicate unnoticed errors.
Using well-designed macros instead offers several advantages. Macros ensure consistency across projects, reduce the likelihood of errors, and significantly saves time in the design process.
Macros also allow for easier modifications. Any changes you make to a macro automatically update all instances. This approach not only improves efficiency but also enhances the overall quality and reliability of electrical designs.
Types of Macros
There are two types of macros: windowed and paged.
Window Macros
These are sections of diagrams that you can easily insert into other pages or projects. Window macros function similarly to symbol libraries. They can contain different variants to accommodate a range of design needs. When you insert a window macro, you can use the Tab key to select from the variants available.
These options may include PLC connections, the type of sensor, or different connection configurations for terminal blocks and busbars. This modular approach enhances flexibility and efficiency in circuit design, allowing for quick customisation of common elements across various projects.
Page Macros
Page macros can include one or more pages featuring complete circuits. Page macros are ideal for inserting the project's core elements for further development. They can also accommodate entire functions that vary based on customer preferences, allowing for tailored project integration.
Creating Macros
Both windowed and paged macros are stored as files in master data folders, which is a crucial detail often overlooked. Understanding this storage method helps prevent common issues such as misplacing macros or accidentally inserting outdated versions.
Users create macros from a pre-existing scheme. Whether window or page macros, you must always select symbols (pages) and select Create from the context menu.
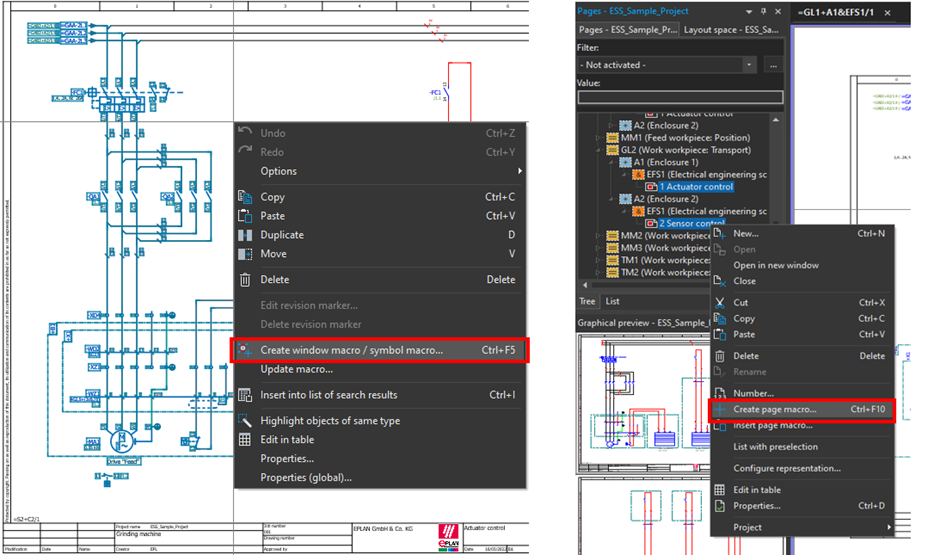
We will demonstrate the procedure for window macros, as they offer more settings. The process for page macros is similar, but with fewer options available.
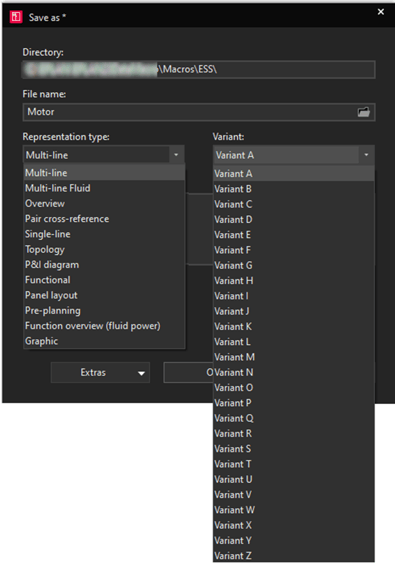
As previously mentioned, macros are a file. Firstly, choose a directory and file name. We recommend saving macros in the EPLAN master data (Data\Macros folder).
This is the default directory that you can reference later using shortcuts from the article database. Most importantly, it automatically loads into the embedded Insert center. The directory structure for storing macros should logically reflect their purpose and content.
Next, choose the representation type. If you have correctly drawn the original pattern in the appropriate representation type, it should be pre-selected. If not, verify the representation type of your source pattern and correct any errors before proceeding.
For each of the display types, you can create 26 letter-marked variants. Thus, you can store multiple A variants in one macro, as long as they are each for a different type of representation type. This is common for devices where there's a variant A for the schematic and another for the overview display.
Finally, you can fill in the description and confirm the creation of the macro (file) with the OK button.
You can then insert a macro from the collection of macros in the insertion center, as shown below.
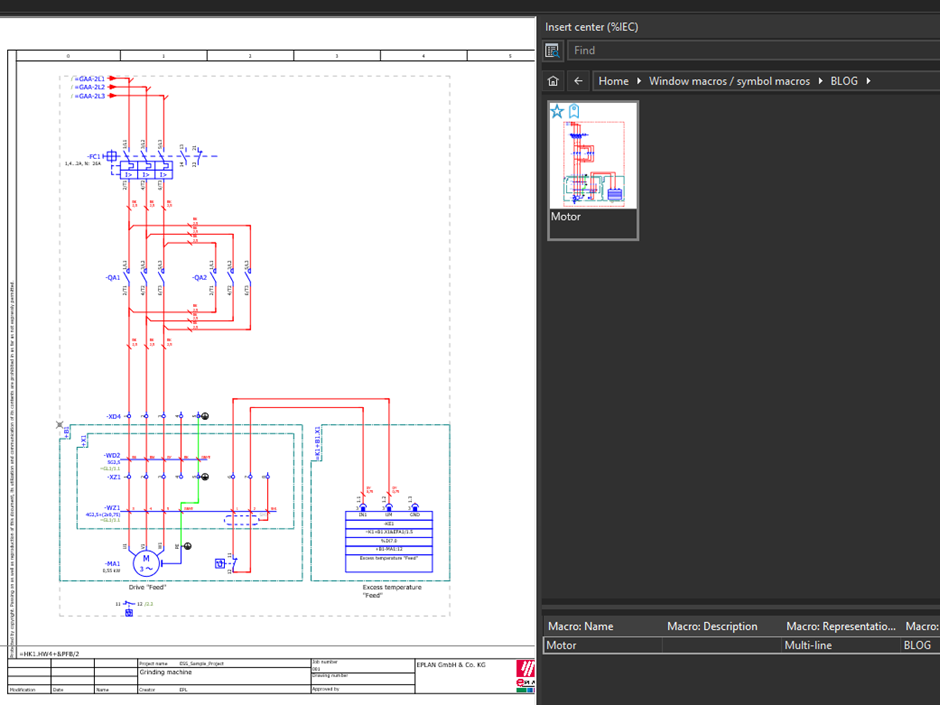
Was the macro not in your collection? You can start the synchronisation of folders with macros using Master data > Macros > Macro collection.

Macro Project
In the previous step, we showed you how to manually create macros. But how do you manage, edit and version them? How do you keep track of which macros you have already created or their save location? This is what the macro project is for.
This project should contain your kind of library, a database in which you will manage all the macros.
We have an advanced training course for anybody interested in creating a macro project and using the macro navigator.
Copy and Paste
You might be thinking 'why use macros and not just copy and paste from old projects?'
We often rely on the copy and paste feature throughout our daily life so it is natural to apply this logic to your workflow. However, you cannot guarantee the integrity with copying and pasting since mistakes can easily slip through the net.
Macro technology, represents a clear source from which we draw and where we correct any problems we find. We can propose alternative solutions for future orders or less experienced colleagues.
Macros present further opportunities to project generators and configurators and eliminate repetitive routine work. This peace of mind is worth the effort of setting up your macro technology.
Choose one of the extension training courses and learn to use the EPLAN Electrical drawing software more effectively.

Comments