
Author

Exporting data to Excel, TXT or XML is similar to the method we discussed in the previous article, but instead of the pages to the project we are creating external files.
For Export and its settings, we must have the required project open and then on the File > Export tab select Production data and Description: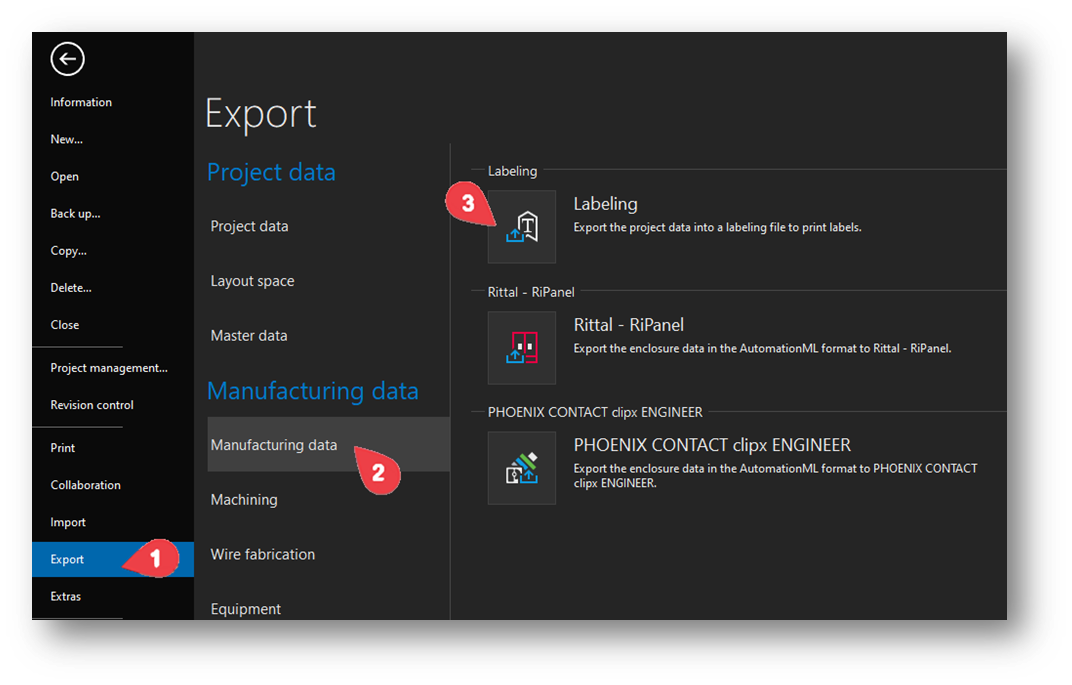
In the following dialog, we will find several prepared outputs, but we will create our own scheme. So, let's start by selecting the button with three dots next to the selection scheme, and then the ‘+’ icon - a new scheme.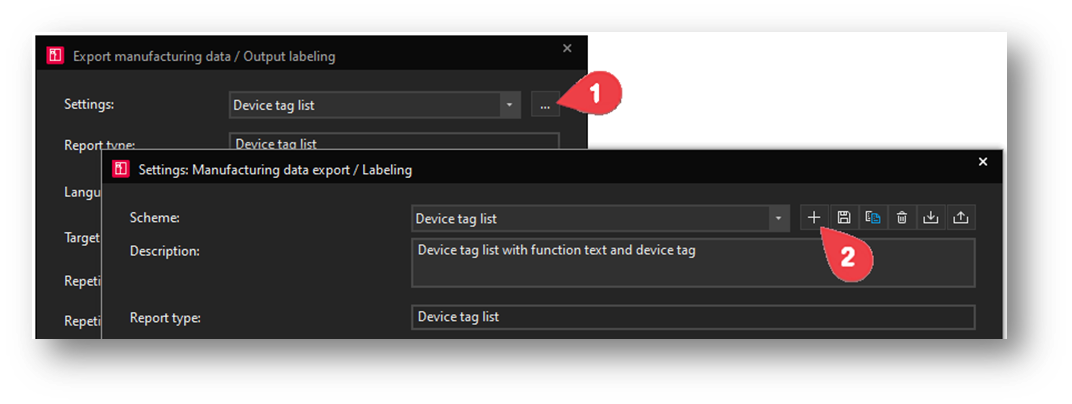
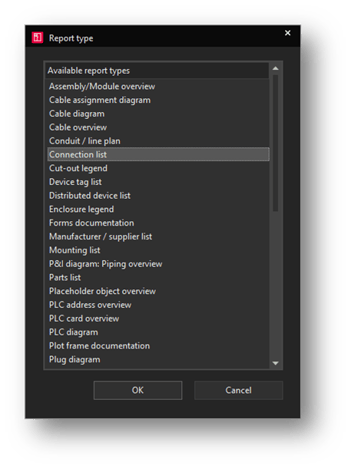
In the following dialog, it’s necessary to select the type of evaluation only outside the project. As an example output, select a list of connections and create a simple wiring table.
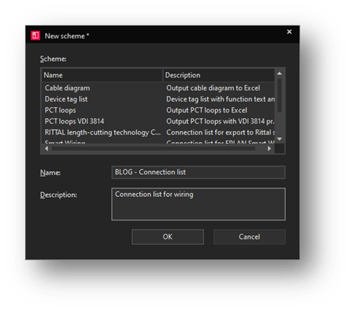
In the next dialog, select the scheme name – I recommend choosing the format COMPANY – List of Connections to easily distinguish your exports from standard or specially modified ones for a particular customer.
Now we'll see a dialogue with five tabs.
File tab
Here, choose the format of the target file and in case of output to MS Excel also a template. This defines where the data will be written in the table.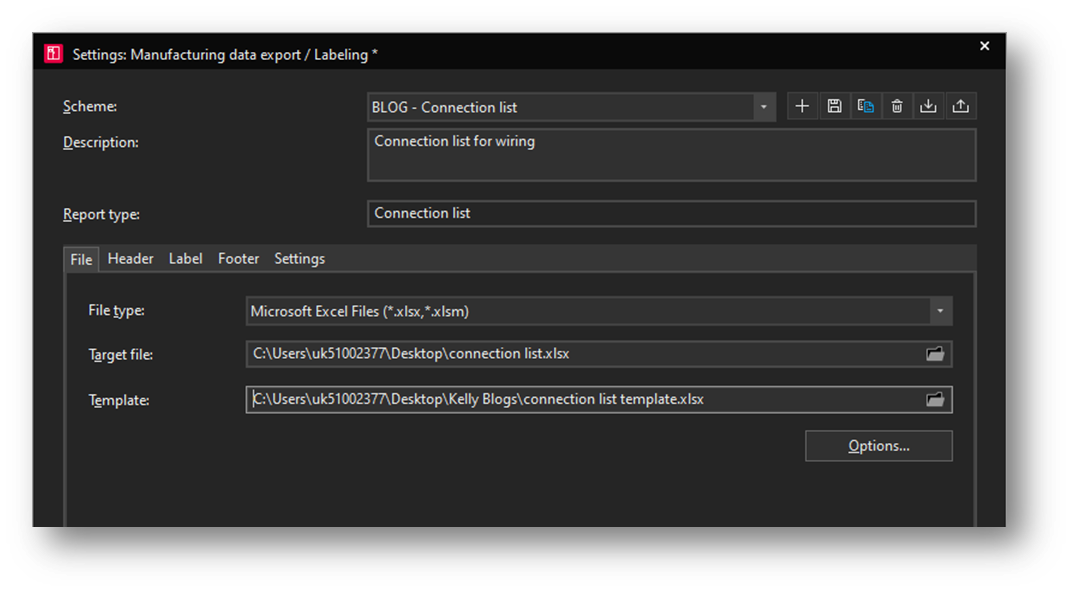
Uses replacement strings:
- #H# for header
- ### for individual table rows (labels)
- #F# for footer
Here you can see a pattern of such a template, where the project properties defined in the header tab are written to the cells in which #H# is written, and instead of ### the joint properties defined in the Label tab are written.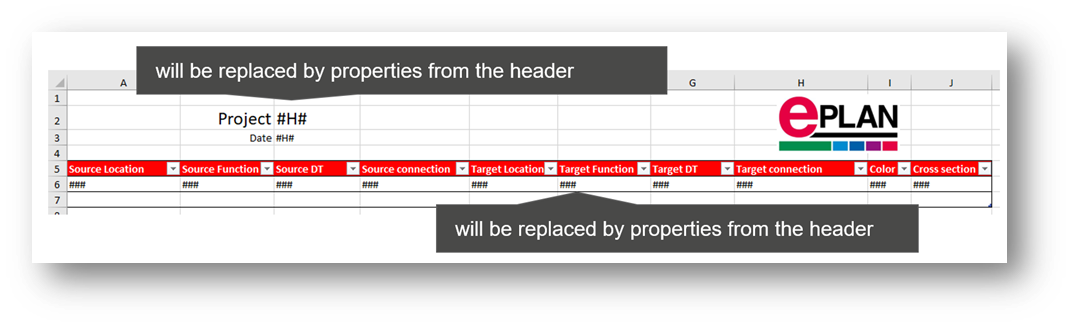
You may notice that the contents of the worksheet are formatted as a table – it can be used for subsequent filtering, for example, only for the switchboard currently being produced. You can download a sample template here:

So, we select Excel as the target file. The path where we save it can be chosen arbitrarily, the placeholder $(DOC) means that it will be created in the DOC folder in the project. And finally, we select the template created.
Header Area tab
Since we have two #H# properties defined in the template, we will select two properties here as well. In this case, only the project properties can be selected: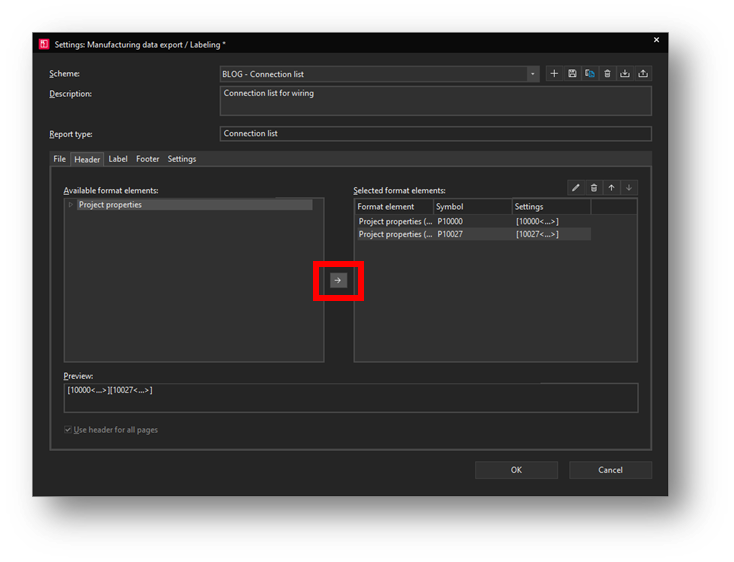
In the left part, you can only select the project properties. Then click on the arrow to bring up a dialog where we select what property you want to list and confirm. For this template, we chose Project Name and Date (see image above).
Label tab
In this tab, we choose what the content will be for each column of the resulting table. Here there are already more options in the left part, so it's necessary to correctly choose which column the properties of the source device will be listed, where the target device and where the properties of the connection itself.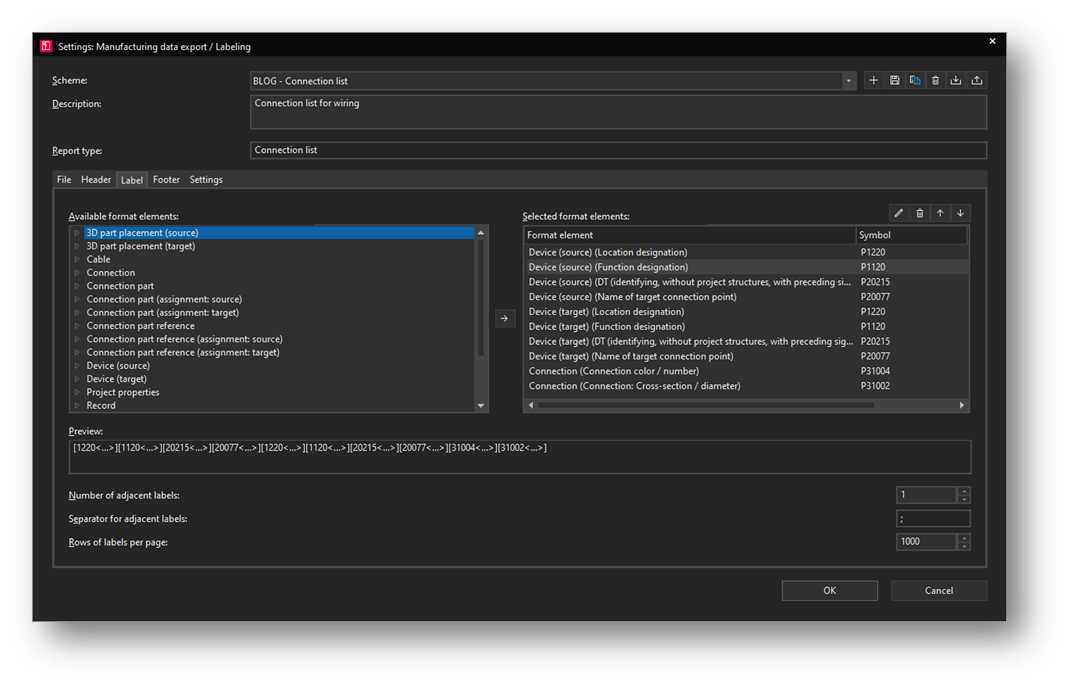
The order of the properties must match the desired order of the columns in the template.
Footer tab
The Footer tab is like the header - it replaces cells with #F# text in the template. We don't have one in our sample template.
Settings tab
In the last tab of Settings, it’s possible, for example, to create a filter – i.e. export only joints that have some property filled in, etc. You may prefer (where possible, i.e. where the property is exported) filtering up to the Excel level.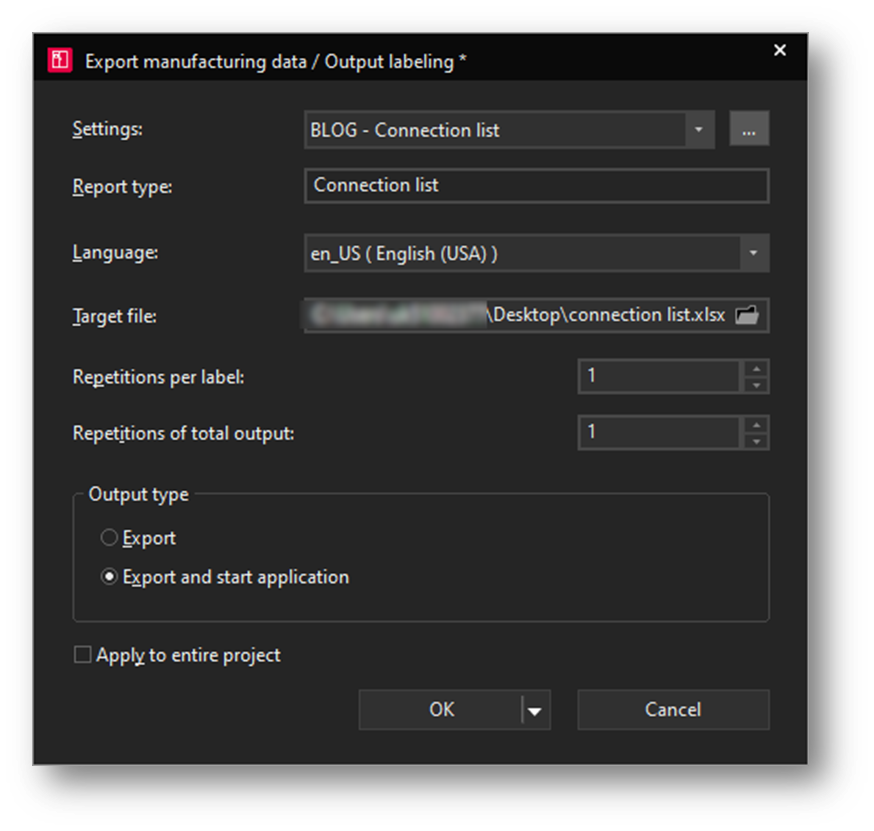
For the function of the sample scheme, we do not need to fill in anything here.
Confirm the dialog, which brings us back to the schema option where our new scheme should be selected. Below we can choose to repeat the label – repeat the lines – for example, if we print each sleeve twice in a row – and repeat the whole edition – e.g. for the production of two identical switchboards.
Finally, choose 'start export' and application to see the result immediately.
The result should look something like this, depending on the project from which you generated the connections: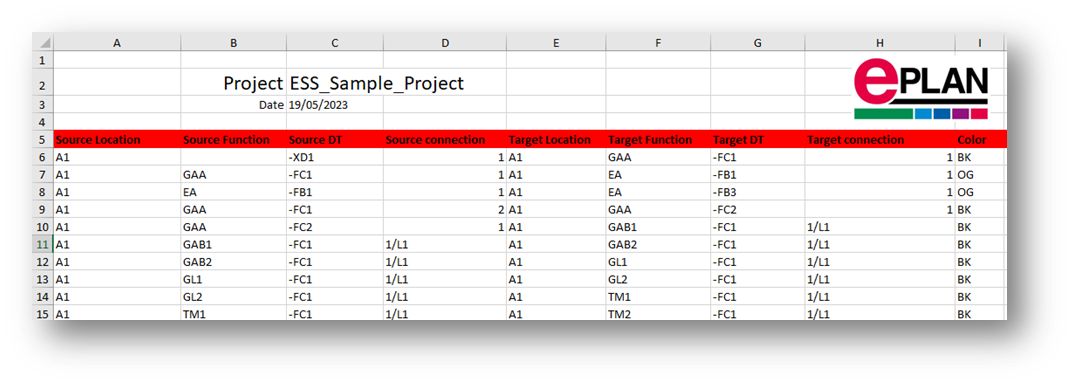
To use the additional features, follow our other blog posts or check out our specialised training courses.
Comments